
How do you hold a violin bow? A step-by-step bow hold
Bent thumb, curved pinky and a relaxed hand: here's how to build your bow hold finger by finger, with pencil exercises to lock it in without tension.
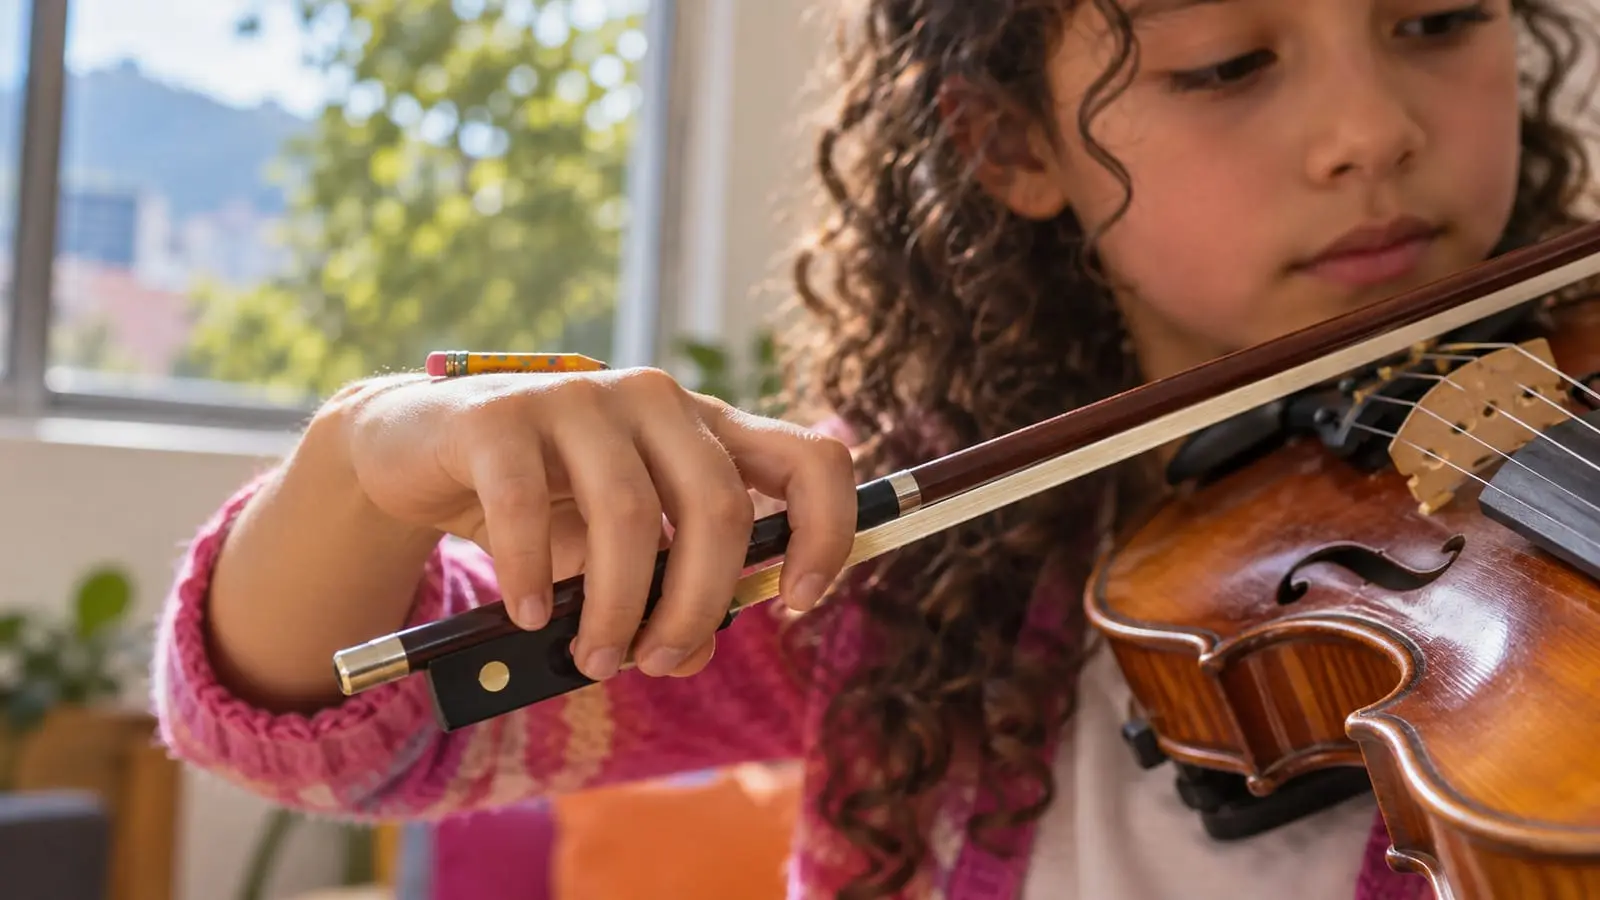
To hold a violin bow, place the tip of your bent thumb on the stick, right in the corner at the end of the frog. Let your middle and ring fingers drape over the frog opposite your thumb; rest your index finger on the stick around its middle segment, and place the tip of your curved pinky on top of the stick. Your hand should be rounded and relaxed, as though holding something fragile.
This is one of the slowest skills to develop on the violin: it feels strange at first and needs checking every time you practice. This guide describes the Franco-Belgian bow hold, one of the most widely used; your teacher may adjust details to suit the size and shape of your hand.
In short
- Your thumb bends outward; it should never be straight or locked.
- Your curved pinky rests on the stick and balances the bow's weight near the frog.
- Sound comes from arm weight transferred through your index finger, not from squeezing the stick.
- Practicing the hold with a pencil for a few minutes a day speeds up learning without putting your bow at risk.
- On the cello, the principle is the same, but the hand hangs more and the pinky doesn't stand on top of the stick.
The bow parts you need to know
| Part | Where it is | Why it matters |
|---|---|---|
| Stick | The long, thin wooden shaft | Where your thumb, index finger, and pinky rest. |
| Bow hair | The hair stretched beneath the stick | The part that touches the string; don't touch it with your fingers. |
| Frog | The part that holds the hair near your hand | Your middle and ring fingers drape over it. |
| Screw | At the end of the frog | Tightens and loosens the hair. |
| Winding and leather grip | The wrapped area next to the frog | Protects the stick where your index finger and thumb rest. |
| Tip | The end opposite the frog | The bow puts less weight on the string here. |
Before playing, turn the screw until the gap between the hair and stick at the middle of the bow is roughly the width of a pencil. Loosen the hair when you're done. We explain more in our violin care guide.
The bow hold, step by step
- Hold the middle of the stick with your left hand, with the tip pointing to your left and the hair facing down.
- Relax your right hand and make a “bunny”: your thumb touches the pads of your middle and ring fingers, while your index finger and pinky stay up like ears.
- Bring that bunny shape to the bow. The tip of your thumb, bent outward, rests on the stick in the corner between the frog and the winding.
- Your middle and ring fingers drape over the frog opposite your thumb. Your ring finger sits roughly over the frog's eye, the mother-of-pearl dot.
- Your index finger wraps around the stick, touching it near its middle segment, with a small gap between it and your middle finger.
- Bend your pinky and rest its tip on top of the stick, roughly above the end of the frog. Keep it curved, not straight.
- Check: bent thumb, rounded knuckles, relaxed wrist, and fingers angled slightly toward the bow tip.
At first, hold the bow this way for a few seconds, release it, and set up the hold again. Repeating the setup is as important as playing: the goal is for your hand to find the position on its own.
Weight: where the sound comes from
A good sound doesn't come from squeezing. It comes from letting your arm's natural weight reach the string through your index finger, with a slight rotation of your forearm toward that finger. Your thumb and middle finger support the bow without pressing.
Because the bow puts more weight on the string near the frog and less at the tip, your hand compensates as you move along it:
| Bow section | What happens | What your hand does |
|---|---|---|
| Frog | The bow's full weight rests on the string | Your pinky balances and lightens the bow; your index finger adds almost no weight. |
| Middle | The weight is more evenly distributed | Index finger and pinky balance each other, with the hand neutral. |
| Tip | The bow puts little weight on the string | Your index finger adds more weight; your pinky relaxes and may straighten slightly. |
A useful exercise: play long tones on open strings from frog to tip, aiming for an equally full sound throughout the stroke. Tune first with the violin tuner so you can focus your listening entirely on tone.
Pencil exercises to practice your bow hold
A pencil is light, sturdy, and always handy, so you can repeat your bow hold many times a day without tiring your hand or risking your bow. It's especially useful for children.
| Exercise | How to do it | Skills it develops |
|---|---|---|
| Assembly | Set up the hold on a pencil, hold it for 20 seconds, release, and repeat five times. | Remembering the hand shape |
| Windshield wiper | With the pencil upright, move it from side to side using only your fingers, without moving your wrist. | Finger flexibility |
| Spider | “Walk” your fingers up the pencil to its tip, then back down without losing the hand shape. | Independence and control |
| Pinky push-ups | With the pencil horizontal, gently bend and straighten your pinky to raise and lower the tip. | Pinky strength and curvature |
| Rocket | Now using the bow, hold it upright in front of you with your bow hold in place, and slowly raise and lower it. | Balance with the bow's actual weight |
Do the exercises in front of a mirror and stop if you feel tension in your thumb or wrist. A few minutes spread throughout the day work better than one long session.
Common bow-hold mistakes
| Error | How it shows up | Correction |
|---|---|---|
| Straight or locked thumb | Harsh sound, rigid hand | Bend your thumb outward and check it during each long tone |
| Straight pinky | The bow wobbles near the frog | Pinky push-up exercise |
| Squeezing the stick | White knuckles, fatigue, or pain | Relax your hold until the bow almost slips, then find the right balance |
| Index finger too far from or too close to the middle finger | Poor control of weight | Leave a small gap and rest the stick near your finger's middle segment |
| Stiff wrist | Abrupt bow changes | Windshield-wiper exercise and slow long tones |
| Touching the bow hair with your fingers | The hair loses grip in that area | Always hold the bow by the stick or frog |
What about viola and cello?
The viola bow hold is almost the same as the violin hold; the bow is a little heavier, so even less pressure is needed. On the cello, however, you bow with your arm more horizontal, and your hand changes shape:
| Aspect | Violin and viola | Cello |
|---|---|---|
| Hand position | More sideways, tilted toward the index finger | Hanging more loosely and spread over the stick |
| Pinky | Curved, with the tip resting on the stick | Rests against the side of the frog or stick |
| Fingers | Close together and angled toward the bow tip | More spread out, wrapping around the stick and frog |
| Weight | Directed through forearm rotation | Transfers more easily through gravity |
If you play violin or cello, your teacher will check your bow hold in every lesson during the first few months; that's normal and necessary. If you're looking for someone to guide you through the process, browse the profiles under teachers.
If you're learning the cello, how long it takes to learn the cello explains why the bow takes up a good part of the first year.
Frequently asked questions
How long does it take for the bow hold to feel natural?
It varies a lot from person to person. It usually takes weeks to stop thinking about each finger and months to refine your use of weight. That's why teachers check it so often at first.
What's the difference between the Franco-Belgian and Russian bow holds?
In the Russian hold, the stick rests farther along the index finger and the hand tilts more toward it, adding more weight with less effort. The Franco-Belgian hold is a middle ground widely used in teaching. Your teacher will decide which suits you best.
Why shouldn't you touch the bow hair?
The natural oils on your fingers stay on the hair and keep the rosin from gripping properly. Over time, that area produces a dull sound or slips on the string.
Do accessories that show where your fingers go help?
Some teachers use them briefly with young children to guide hand position. They're a temporary aid: the goal is for your hand to learn the shape without them.
Sources
We checked the facts in this article against these sources on October 22, 2026.