
How do you place your fingers on the violin? First position
Fingers together for a half step, apart for a whole step: that's how the left hand works in first position, with a note map and exercises to play in tune without frets.
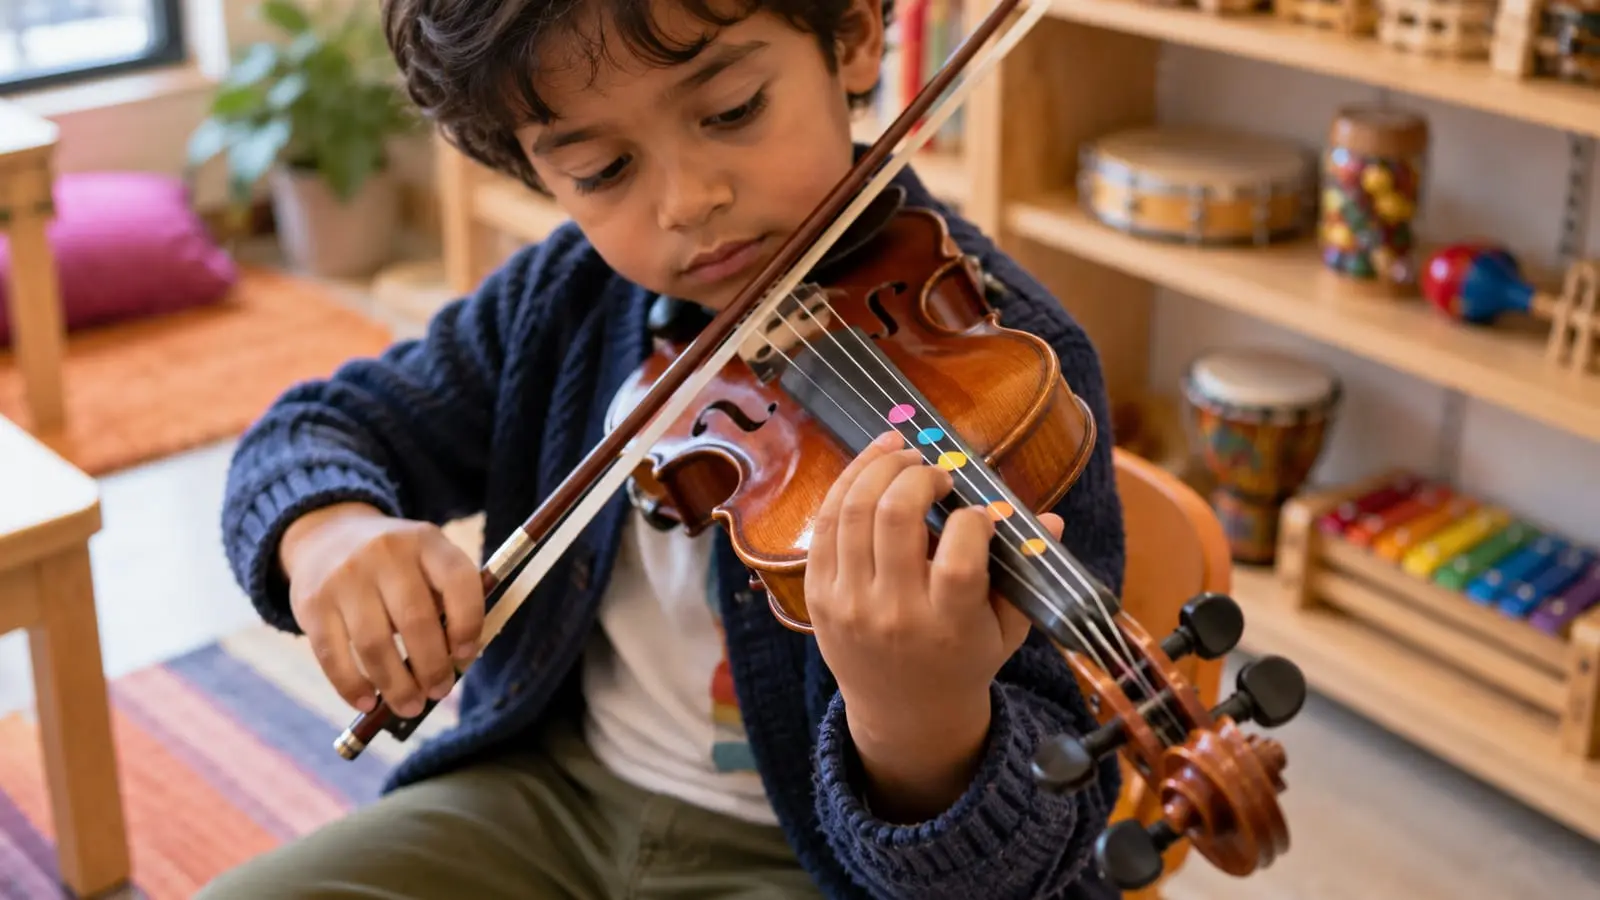
In first position on the violin, the first finger (index finger) goes a whole step above the open string, and the others are placed according to the scale: apart when two notes are a whole step apart and touching when they are a half step apart. On the A string in the D major scale, fingers 1, 2, 3, and 4 play B, C sharp, D, and E, and that fourth-finger E should sound the same as the open E string.
Because the violin has no frets, your hand learns the distances and your ear corrects them. Here you'll find a first-position note map, the four most common finger patterns, tips for using finger tapes, and exercises to help your hand find the notes on its own.
In short
- Fingers are numbered from 1 (index) to 4 (pinky); 0 means an open string.
- In first position, finger 1 is a whole step above the open string, and finger 4 sounds the same as the next open string.
- Touching fingers mean a half step; separated fingers mean a whole step. The key signature tells you which pattern to use on each string.
- Check the third finger against the lower open string: when the note is in tune, that string vibrates on its own through resonance.
- Finger tapes help at first, but your ear decides whether you're in tune, not your eyes.
Finger numbers and hand shape
In violin sheet music, numbers above the notes indicate the left-hand finger: 1 is the index finger, 2 the middle finger, 3 the ring finger, and 4 the pinky. 0 means an open string. The thumb has no number because it doesn't stop the strings; it rests behind the neck.
- Thumb: relaxed, roughly opposite the first or second finger. Don't squeeze: the chin rest and shoulder support the violin.
- Wrist: straight, in line with the forearm. If it bends inward and the palm presses against the neck, your fingers lose strength and reach.
- Fingers: curved, landing on the string with the fingertips like little hammers. This keeps them from brushing the neighboring string.
- Base of the index finger: lightly touches the side of the neck near the nut, giving you a reference point.
- Elbow: underneath the violin. It moves slightly to the right to reach the G string and to the left for the E string.
Keep your left-hand nails short: if the nail touches the fingerboard before the fingertip, the finger lands flat and the note becomes unreliable. Press only enough for the string to touch the fingerboard and sound clear; extra force won't improve the sound and will tire your hand.
The first-position note map
Before placing your fingers, tune your violin: if the open strings are out of tune, none of the references will help. The table shows the note each finger plays on each string. The second finger has two possible placements: “low,” touching the first finger, and “high,” touching the third.
| String | 0 (open) | 1 | Low 2 | High 2 | 3 | 4 |
|---|---|---|---|---|---|---|
| G | G | A | B♭ | B | C | D |
| D | D | E | F | F♯ | G | A |
| A | A | B | C | C♯ | D | E |
| E | E | F♯ | G | G♯ | A | B |
Two recurring relationships help you find your way. Finger 4 on each string plays the same note as the next open string (D, A, and E). Finger 3 plays an octave above the previous open string: G on the D string, D on the A string, and A on the E string.
The four finger patterns
Instead of memorizing each note separately, violinists think in patterns: the shape your hand takes depending on where the half step falls. Different methods number them differently, so here we name them by the fingers that touch.
| Pattern | Where the half step falls | Example on the A string | Where it occurs |
|---|---|---|---|
| 2 and 3 touching | Between fingers 2 and 3 | A, B, C sharp, D, E | D major on the D and A strings; A major on the A and E strings |
| 1 and 2 touching | Between fingers 1 and 2 | A, B, C, D, E | G major on the A and E strings; C major on the D and A strings |
| 3 and 4 touching | Between fingers 3 and 4 | A, B, C sharp, D sharp, E | A major on the D string; D major on the G string |
| Low 1 | Between the open string and finger 1 | A, B flat, C, D, E | F major on the A string; C major on the E string |
How do you know which one to use? Look at the key signature. If the piece has C sharp, the second finger on the A string is high; if it has C natural, it's low, touching the first finger. The same applies to F on the D string and G on the E string. Before playing a new piece, work through the key signature string by string and decide where each second finger will go: you'll avoid many wrong notes.
Finger tapes: how to use them without becoming dependent
Many teachers put thin tapes on the fingerboard at first to give your hand a visual reference. Most mark finger 1, high 2, and 3; some add low 2 or 4. Your teacher places them note by note using a tuner, because the distances vary with each violin and size.
- Look at the tapes to place your hand, but listen to make corrections. If the note sounds flat with your finger on the tape, move your finger: the tape marks an area, not an exact point.
- Place your finger on the tape, not beside it. On a small violin, even half a centimeter can make a note sound out of tune.
- Check occasionally that the tapes haven't shifted, especially after cleaning the fingerboard.
- Once you can play a note in tune without looking, you can remove that tape. They're usually removed one at a time.
A trick for gradually letting go of them: play the scale with your eyes closed, then check after each note whether your finger landed on the tape. If it nearly always does, your hand has learned that distance.
How to check intonation against open strings
Your best reference is built into the violin: its open strings. Several first-position notes match them in unison or at the octave. When those notes are in tune, the neighboring open string vibrates on its own through resonance. The violin sounds fuller, with a noticeable brightness even when you aren't playing that string.
| Stopped note | Compare it with | What to look for |
|---|---|---|
| Finger 4 on G, D, or A | The next open string (D, A, or E) | Unison: both sound like a single note, with no beating |
| Finger 3 on D, A, or E | The previous open string (G, D, or A) | A clean octave and sympathetic vibration of the open string |
| Finger 1 on G or D | The open string two strings higher (A or E) | Octave: the open string resonates without being played |
To practice this, bow the stopped note and then, without lifting your finger, play the open string; or play both together as a double stop. Check notes without an open-string reference, such as second-finger notes, with the violin tuner.
Exercises to help your hand find the notes
Do these slowly, with the metronome at 60 and one note per beat. Five minutes at the start of practice is enough.
- Little hammers without the bow. Hold the violin in playing position, drop each finger onto the A string from a couple of centimeters above it, and lift it again, one at a time. Aim to land on the fingertip and hear a small tap.
- Pizzicato ladder. Play 0-1-2-3-4-3-2-1-0 on one string in pizzicato. Without the bow, you can focus entirely on intonation. When you reach 4, compare it with the next open string.
- Fingers that stay down. As you go up, leave the previous fingers in place: when you play 3, fingers 1 and 2 stay on the string. This gives your hand stability. As you go down, lift only the finger whose note has finished.
- Low and high second finger. On the A string, alternate 1-2-1-2, first with C and then with C sharp. This is the movement that causes the most confusion at first.
- Same pattern, different string. Play the pattern with 2 and 3 touching on the A string, then on the D string without changing your hand shape. Your elbow moves; your finger pattern stays the same.
- Scale with a drone. Play a one-octave D major scale over a sustained D from a keyboard or app. Each note has its own color against the D; an out-of-tune note produces a noticeable roughness.
Common left-hand mistakes
| Error | How it shows up | Correction |
|---|---|---|
| Squeezing the neck with the thumb | A tired hand, slow fingers, discomfort at the base of the thumb | Move your thumb while playing: if it can move, it isn't squeezing |
| Wrist bent toward the neck | Flat fingers and not enough reach for 4 | Leave space between your palm and the neck |
| Flat fingers | They brush the neighboring string, producing an extra or muted note | Curve your fingers and land on the fingertips |
| Lifting fingers too high | Notes arrive late in fast passages | Lift them only slightly, keeping them close to the string |
| Avoiding the fourth finger | Everything is played with open strings | Pizzicato ladder, comparing 4 with the open string |
| Playing while watching the tapes | A twisted neck and distracted listening | Look once, then listen and adjust |
Almost all these mistakes are visible to an observer before they're audible. That's why, in violin lessons, your teacher checks your left hand every session during the first few months and adjusts your position to the size of your hand and instrument. Once first position is stable, the next expressive step is vibrato.
Frequently asked questions
How hard should you press a violin string?
Just enough for the string to touch the fingerboard and the note to sound clear. A useful exercise: place your finger so lightly that you hear a whistling sound, then gradually increase the pressure until the note becomes clear. That point, with a little extra weight, is enough.
Why am I out of tune even with my finger on the tape?
Because the tape marks an area, and your finger can land farther forward, farther back, or at an angle. Tapes also shift with use. Your ear always has the final say: listen and adjust by moving your finger just a few millimeters.
When do you use the fourth finger instead of an open string?
An open string sounds brighter and doesn't allow vibrato; the fourth finger gives a sound more consistent with neighboring notes and avoids string changes in fast passages. The sheet music usually indicates which to use; otherwise, your teacher will advise you. What matters is training your fourth finger so you have a choice.
What are second and third position?
They are hand placements higher up the fingerboard. In third position, for example, the first finger plays the note you played with the third finger in first position. You learn them once first position is stable, because they use the same hand shapes in a different place.
Sources
We checked the facts in this article against these sources on October 22, 2026.